Google login authentication is very important for you who want to create Google Applications. One of them are blogger application. And like what we announced on Facebook, Google Plus, Twitter, we will give a tutorial about blogger API v3, and here we come. Before we talk this more complete, we should give tutorial about how to create Google Login Authentication. because, blogger API v3 need token to access blogs of a user.
Now, let's we go to start. Blogger API v3 has courtesy limit. Minimum limi is 10,000 request/day. When you ready with this limit, then go to API Console. You must registering your blog to API Console. Below is the complete instruction how to register your blogger
1. Go to API Console
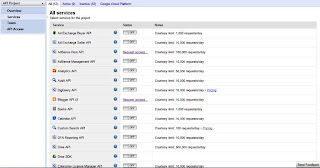
3. On the right side, you will see list of all services, choose Blogger API v3 by clicking request access status
4. After click request access link, then you will see Blogger JSON API Quota Request, you must fill all the question on that page
5. Click submit below of that page
after you success follow these steps, Google will review your reason and your blog traffic. If Google accepted, then you will get your client ID, client secret, redirect URI. By default, redirect URI will created by Google with secure HTTPS, you must change this secure with HTTP. However, if your blog is support with both HTTPS and HTTP then you must submit all.
Get Token
Each products of Google have different token. These tokens depend on the scope of authentication. For blogger API v3, the scope is
https://www.googleapis.com/auth/blogger
and for Google Plus (one of them), has scope
https://www.googleapis.com/auth/plus.me
Google offer so many ways in creating authentication. But from all ways there is one (and in this tutorial) the most easy and fast in creating that. Using Google API Authentication Javascript is the answer. However, Google API Authentication with Javascript not easy for several people (not like Facebook). But, we will (try) to give this tutorial more easy to you. Remember, like Facebook, the core of login process is token value. What you should to do is simple, see the example code below
1. Put the following code before </head>
<script src="https://apis.google.com/js/client.js"></script>
2. Put the snippet code before </head>
<script>
function auth(){
gapi.auth.authorize({client_id:'YOUR_CLIENT_ID',scope:'https://www.googleapis.com/auth/blogger',immediate:true},function(){
alert('login complete');
alert(gapi.auth.getToken().access_token);
});
}
</script>
3. Put the HTML5 code anywhere inside body tag
<button onclick="auth();">Demo Authorize</button>
<button onclick="auth();">Demo Authorize</button>
If you see carefully on the code above, we use immediate:'true'. This way is to prevent from popup window. Because popup window very bad for SEO. To see the result of this tutorial, click login button below, after login you will see "login success" and access_token value.


Post a Comment