 |
| Example |
The weakness of automatic image layout not only that, you can not place two images on left and right and posting content on the middle together.
All the weaknesses you can solve become more better. On this post, we share to you how to handle image layout for your post. All the keys are on CSS and HTML.
Prevent caption width more bigger than image width
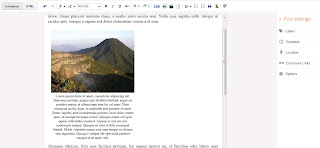
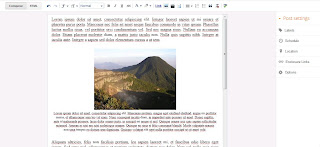
Try to make a posting, then embed an image. Give caption with long sentence. Make sure you write post on Compose setting. After embed an image, click HTML. Find the similar code below
<table align="center" cellpadding="0" cellspacing="0" class="tr-caption-container" style="margin-left: auto; margin-right: auto; text-align: center;"><tbody>
<tr><td style="text-align: center;"><a href="https://blogger.googleusercontent.com/img/b/R29vZ2xl/AVvXsEhGF5ksgljmpOOlLiPo-w8gKoofu_dbD3WzWWFenzf9Llt-518I8kKqPpJFY8hfY74EpjnDAgrdCj_UqfKVJ3vFYlOOZGwlHQzy18Uaq_ECT3OWhXcxSNQxjB1Tm1W7vfE1faHPDHxfb6o/s1600/pangrango2-a.jpg" imageanchor="1" style="margin-left: auto; margin-right: auto;"><img border="0" height="239" src="https://blogger.googleusercontent.com/img/b/R29vZ2xl/AVvXsEhGF5ksgljmpOOlLiPo-w8gKoofu_dbD3WzWWFenzf9Llt-518I8kKqPpJFY8hfY74EpjnDAgrdCj_UqfKVJ3vFYlOOZGwlHQzy18Uaq_ECT3OWhXcxSNQxjB1Tm1W7vfE1faHPDHxfb6o/s320/pangrango2-a.jpg" width="320" /></a></td></tr>
<tr><td class="tr-caption" style="text-align: center;">Lorem ipsum dolor sit amet, consectetur adipiscing elit. Maecenas pretium, magna eget eleifend eleifend, augue mi porttitor massa, et ullamcorper sem leo vel nunc. Nunc consequat iaculis diam, in imperdiet ante posuere sit amet. Donec sagittis, ante id malesuada posuere, lacus dolor ornare justo, in suscipit mi neque et nisl. Quisque ornare orci quis sapien sollicitudin euismod. Aenean ac nisi nec nisi scelerisque semper. Quisque eu risus et felis consequat blandit. Morbi vulputate mauris non urna tempus eu dictum sem dignissim. Quisque volutpat elit eget nulla porttitor suscipit ut sit amet velit.<br /></td></tr>
</tbody></table>
You wil find image width information. Then put the code below before <table>
<div style="width:320px;margin:0 5px;">
After that, put </div> after </table>. Make sure you do that correctly. And click Compose. Now, you see caption width is no longer more bigger than image width.
Prevent caption width more bigger than image width, if image is placed on left or right posting
Try to make a post, then embed an image on left or right of posting area. Give caption with long sentence. Make sure you write post on Compose setting. After you give caption, click HTML,then find the similar code below
<table cellpadding="0" cellspacing="0" class="tr-caption-container" style="float: right; margin-left: 1em; text-align: right;"><tbody>
<tr><td style="text-align: center;"><a href="https://blogger.googleusercontent.com/img/b/R29vZ2xl/AVvXsEhGF5ksgljmpOOlLiPo-w8gKoofu_dbD3WzWWFenzf9Llt-518I8kKqPpJFY8hfY74EpjnDAgrdCj_UqfKVJ3vFYlOOZGwlHQzy18Uaq_ECT3OWhXcxSNQxjB1Tm1W7vfE1faHPDHxfb6o/s1600/pangrango2-a.jpg" imageanchor="1" style="clear: right; margin-bottom: 1em; margin-left: auto; margin-right: auto;"><img border="0" height="239" src="https://blogger.googleusercontent.com/img/b/R29vZ2xl/AVvXsEhGF5ksgljmpOOlLiPo-w8gKoofu_dbD3WzWWFenzf9Llt-518I8kKqPpJFY8hfY74EpjnDAgrdCj_UqfKVJ3vFYlOOZGwlHQzy18Uaq_ECT3OWhXcxSNQxjB1Tm1W7vfE1faHPDHxfb6o/s320/pangrango2-a.jpg" width="320" /></a></td></tr>
<tr><td class="tr-caption" style="text-align: center;">Lorem ipsum dolor sit amet, consectetur adipiscing elit. Maecenas
pretium, magna eget eleifend eleifend, augue mi porttitor massa, et
ullamcorper sem leo vel nunc. Nunc consequat iaculis diam, in imperdiet
ante posuere sit amet. Donec sagittis, ante id malesuada posuere, lacus
dolor ornare justo, in suscipit mi neque et nisl. Quisque ornare orci
quis sapien sollicitudin euismod. Aenean ac nisi nec nisi scelerisque
semper. Quisque eu risus et felis consequat blandit. Morbi vulputate
mauris non urna tempus eu dictum sem dignissim. Quisque volutpat elit
eget nulla porttitor suscipit ut sit amet velit.</td></tr>
</tbody></table>
If you put image on right posting area then put the code below before <table>
<div style="margin: 0 0 0 10px; float:right; width:320px;">
Else if you put on left posting area then put the code below before <table>
<div style="margin: 0 10px 0 0; float:left; width:320px;">
Other side, put </div> after </table>. After this, you will see an image on left or right of posting area with caption width never bigger than image width.
Make Posting Content Between Two Images
Make a posting, contain of two paragraph or more (this is just example, not necessary). Each paragraph containt many of sentence. Then, between paragraph one and two, give 3 space (this is just to make beauty). Put two images vertically. Arrange these images on center of posting area. Give each images with long sentence caption. Make sure you do this on Compose, after you give caption then click HTML, then find the code below
<table align="center" cellpadding="0" cellspacing="0" class="tr-caption-container" style="float: left; margin-right: 1em; text-align: left;"><tbody>
<tr><td style="text-align: center;"><a href="https://blogger.googleusercontent.com/img/b/R29vZ2xl/AVvXsEhGF5ksgljmpOOlLiPo-w8gKoofu_dbD3WzWWFenzf9Llt-518I8kKqPpJFY8hfY74EpjnDAgrdCj_UqfKVJ3vFYlOOZGwlHQzy18Uaq_ECT3OWhXcxSNQxjB1Tm1W7vfE1faHPDHxfb6o/s200/pangrango2-a.jpg" imageanchor="1" style="margin-left: auto; margin-right: auto;"><img border="0" height="239" src="https://blogger.googleusercontent.com/img/b/R29vZ2xl/AVvXsEhGF5ksgljmpOOlLiPo-w8gKoofu_dbD3WzWWFenzf9Llt-518I8kKqPpJFY8hfY74EpjnDAgrdCj_UqfKVJ3vFYlOOZGwlHQzy18Uaq_ECT3OWhXcxSNQxjB1Tm1W7vfE1faHPDHxfb6o/s320/pangrango2-a.jpg" width="200" /></a></td></tr>
<tr><td class="tr-caption" style="text-align: center;"><div style="text-align: justify;">
Lorem ipsum dolor sit amet,
consectetur adipiscing elit. Integer laoreet sapien ut mi ornare et
pharetra purus porta. Maecenas nec felis sit amet neque faucibus commodo
in vitae ipsum. Phasellus luctus mollis risus, vel porttitor orci
condimentum vel. Sed nec magna risus. Nullam eu accumsan dolor. Etiam
placerat molestie diam, a mattis justo iaculis non. Nulla quis sagittis
nibh. Integer at iaculis ante. Integer a sapien sed dolor elementum
cursus a at sem.</div>
</td></tr>
</tbody></table>
<table align="center" cellpadding="0" cellspacing="0" class="tr-caption-container" style="float: right; margin-left: 1em; text-align: right;"><tbody>
<tr><td style="text-align: center;"><a href="https://blogger.googleusercontent.com/img/b/R29vZ2xl/AVvXsEiWX39wO19QI7yg8kdtsWef4FFIqVhBXFyRZFrHqhPIKm10QucgV6oaJX2fkahsndf_yzco_I2KzCvY9wTmZ35qe9X1s9F6QosE3wTzkrYfcSO89_HgFdYHjJP3R-wlQj6P-xhQKd1Zaoo/s200/Image015.JPG" imageanchor="1" style="margin-left: auto; margin-right: auto;"><img border="0" height="240" src="https://blogger.googleusercontent.com/img/b/R29vZ2xl/AVvXsEiWX39wO19QI7yg8kdtsWef4FFIqVhBXFyRZFrHqhPIKm10QucgV6oaJX2fkahsndf_yzco_I2KzCvY9wTmZ35qe9X1s9F6QosE3wTzkrYfcSO89_HgFdYHjJP3R-wlQj6P-xhQKd1Zaoo/s320/Image015.JPG" width="200" /></a></td></tr>
<tr><td class="tr-caption" style="text-align: center;"><div style="text-align: justify;">
Lorem ipsum dolor sit amet,
consectetur adipiscing elit. Integer laoreet sapien ut mi ornare et
pharetra purus porta. Maecenas nec felis sit amet neque faucibus commodo
in vitae ipsum. Phasellus luctus mollis risus, vel porttitor orci
condimentum vel. Sed nec magna risus. Nullam eu accumsan dolor. Etiam
placerat molestie diam, a mattis justo iaculis non. Nulla quis sagittis
nibh. Integer at iaculis ante. Integer a sapien sed dolor elementum
cursus a at sem.</div>
</td></tr>
</tbody></table>
Place the code above with the code below (actually, just add the code what we have explained above)
<div style="float: left; height: auto; margin-right: 1em; width: 200px;">
<table align="center" cellpadding="0" cellspacing="0" class="tr-caption-container" style="float: left; margin-right: 1em; text-align: left;"><tbody>
<tr><td style="text-align: center;"><a href="https://blogger.googleusercontent.com/img/b/R29vZ2xl/AVvXsEhGF5ksgljmpOOlLiPo-w8gKoofu_dbD3WzWWFenzf9Llt-518I8kKqPpJFY8hfY74EpjnDAgrdCj_UqfKVJ3vFYlOOZGwlHQzy18Uaq_ECT3OWhXcxSNQxjB1Tm1W7vfE1faHPDHxfb6o/s1600/pangrango2-a.jpg" imageanchor="1" style="margin-left: auto; margin-right: auto;"><img border="0" height="149" src="https://blogger.googleusercontent.com/img/b/R29vZ2xl/AVvXsEhGF5ksgljmpOOlLiPo-w8gKoofu_dbD3WzWWFenzf9Llt-518I8kKqPpJFY8hfY74EpjnDAgrdCj_UqfKVJ3vFYlOOZGwlHQzy18Uaq_ECT3OWhXcxSNQxjB1Tm1W7vfE1faHPDHxfb6o/s200/pangrango2-a.jpg" width="200" /></a></td></tr>
<tr><td class="tr-caption" style="text-align: center;"><div style="text-align: justify;">
Lorem ipsum dolor sit amet,
consectetur adipiscing elit. Integer laoreet sapien ut mi ornare et
pharetra purus porta. Maecenas nec felis sit amet neque faucibus commodo
in vitae ipsum. Phasellus luctus mollis risus, vel porttitor orci
condimentum vel. Sed nec magna risus. Nullam eu accumsan dolor. Etiam
placerat molestie diam, a mattis justo iaculis non. Nulla quis sagittis
nibh. Integer at iaculis ante. Integer a sapien sed dolor elementum
cursus a at sem.</div>
</td></tr>
</tbody></table>
</div>
<div style="float: right; height: auto; margin-left: 1em; width: 200px;">
<table align="center" cellpadding="0" cellspacing="0" class="tr-caption-container" style="float: right; margin-left: 1em; text-align: right;"><tbody>
<tr><td style="text-align: center;"><a href="https://blogger.googleusercontent.com/img/b/R29vZ2xl/AVvXsEiWX39wO19QI7yg8kdtsWef4FFIqVhBXFyRZFrHqhPIKm10QucgV6oaJX2fkahsndf_yzco_I2KzCvY9wTmZ35qe9X1s9F6QosE3wTzkrYfcSO89_HgFdYHjJP3R-wlQj6P-xhQKd1Zaoo/s1600/Image015.JPG" imageanchor="1" style="margin-left: auto; margin-right: auto;"><img border="0" height="150" src="https://blogger.googleusercontent.com/img/b/R29vZ2xl/AVvXsEiWX39wO19QI7yg8kdtsWef4FFIqVhBXFyRZFrHqhPIKm10QucgV6oaJX2fkahsndf_yzco_I2KzCvY9wTmZ35qe9X1s9F6QosE3wTzkrYfcSO89_HgFdYHjJP3R-wlQj6P-xhQKd1Zaoo/s200/Image015.JPG" width="200" /></a></td></tr>
<tr><td class="tr-caption" style="text-align: center;"><div style="text-align: justify;">
Lorem ipsum dolor sit amet,
consectetur adipiscing elit. Integer laoreet sapien ut mi ornare et
pharetra purus porta. Maecenas nec felis sit amet neque faucibus commodo
in vitae ipsum. Phasellus luctus mollis risus, vel porttitor orci
condimentum vel. Sed nec magna risus. Nullam eu accumsan dolor. Etiam
placerat molestie diam, a mattis justo iaculis non. Nulla quis sagittis
nibh. Integer at iaculis ante. Integer a sapien sed dolor elementum
cursus a at sem.</div>
</td></tr>
</tbody></table>
After you put the code above, then click Compose again. May be you will see posting content not perfectly on the middle of posting area. But this problem can solved with put cursor on the beginning of paragraph two. Then push the Backspace button several times, until you get the best layout.
As example of this tutorial, you can go to our posts about Gravity Mapping On Mars Show Unique Vulcanic History and Experiments Underestimate Plants Respond to Climate Change. Now, try this tutorial, and make it great.


Post a Comment